Showing posts with label tutorials. Show all posts

Tuesday, September 8, 2009

Automated Computer Maintenance & Optimization Tips


"Fragmentation is caused by creating and deleting files and folders, installing new software, and downloading files from the Internet. Computers do not necessarily save an entire file or folder in a single space on a disk; they're saved in the first available space. After a large portion of a disk has been used, most of the subsequent files and folders are saved in pieces across the volume.

...Defragmentation is the process of rewriting non-contiguous parts of a file to contiguous sectors on a disk for the purpose of increasing data access and retrieval speeds. Because FAT and NTFS disks can deteriorate and become badly fragmented over time, defragmentation is vital for optimal system performance." -
http://www.auslogics.com/disk-defrag

I constantly add, move and delete files, so my own answer to the much debated question of "How often should I defrag?" is monthly. There are three programs I use to maintain my computer:
  1. Auslogics Disk Defrag - Defragmentation
  2. CCleaner - Registry maintenance
  3. CleanUp! - Thorough disk cleanup

Auslogics Disk Defrag has a Schedule option to automatically defrag monthly. The reason I chose Disk Defrag over Piriform Defraggler is because by default Auslogics defrags all local drives automatically. Piriform will only let you defrag one hard drive at a time. Also, Auslogics Disk Defrag was an Editor's pick for MajorGeeks.com and is rated 5-stars by Editors on cnet.com.


CCleaner I have to manually run whenever I feel like I've bogged down my registry with installations and program removals. Usually monthly.


CleanUp! can be setup with Windows Task Scheduler using "C:\Program Files\CleanUp\Cleanup.exe -AutoRun". Since I'm all portable, I scheduled this daily.

Thursday, August 13, 2009

View/Backup Gchats in Thunderbird

Create a simple filter that looks for "Chat with" in the Subject and apply the label "gchats" to see your conversations as a folder in Thunderbird:

Wednesday, August 12, 2009

Backup Your Gmail with Portable Thunderbird & Gmail IMAP Extension

As much as we all love Google, it's downright scary entrusting your emails/life to them. They have the control, not you. So, today I've decided to reign in my 7 gigs of email history, organize it and store it away. It's time to take back control and here's how I'm going to do it.

I'll only need three things:

Portable Thunderbird
(http://portableapps.com/apps/internet/thunderbird_portable)


Gmail IMAP Account Setup extension for Thunderbird
(https://addons.mozilla.org/en-US/thunderbird/addon/6381)

Zindus extension for backing up contacts
(https://addons.mozilla.org/en-US/thunderbird/addon/6095)


I've created a 20 gig TrueCrypt volume to hold all my emails. Even though I have 7 gigs of data on GMail, I'm using two methods to backup my emails.

  • Method#1 is using POP.
  • Method#2 is IMAP.

The reason I am using both methods is the off-chance that I somehow accidentally reconnect a backup copy of my IMAP account with the new wiped out Gmail I'm moving to. Also because of the fact that after downloading 10,000+ emails via POP it is only downloading 1 message at a time and it still has about 5,000 emails to go...

Method#1 is pretty standard, setup Gmail in Thunderbird like a regular POP account. The down-side to this method is that it only downloads received emails, not sent messages and you don't have labels as folders.

Method#2 is only 4 steps:
First, install the Gmail IMAP Account Setup extension.

Then add your IMAP account under Tools > Account Settings... > Add Account... > Gmail IMAP


After it's setup, Thunderbird will need to restart.

Next, go to Tools > Account Settings... > Offline & Disk Space (make sure you're under your IMAP account)
  • check the box for "Make the messages in my Inbox available..."
  • click the button for "Select folders for offline use..." and check all your folders


Last, [*Update*: After a while I noticed the status bar does not show anything and you have no clue if it's still downloading messages, rather than using File > Offline > Download/Sync Now..., you can choose to Work Offline and it will ask you if you want to download your messages before going offline. Then you know it's still working in the background until it goes offline. Or continue below to use the old way.]

the old way:

go to File > Offline > Download/Sync Now...
  • check the box for "Mail Messages" and hit OK


That's it! Just sit back and watch Thunderbird do all the work.


While it's doing that, install and configure Zindus to backup your contacts.

Note:
  • You CANnot sync your chats using this method. [*UPDATE*: I thought of a way to save chats. Apply a label to all your chats such as a "gchats" label and check that as one of your folders under Tools > Account Settings... > Offline & Disk Space...]
  • If you're storing this backup away and wiping your emails online, you should go into Offline mode and reset your gmail password to avoid any accidental syncing.

Monday, July 13, 2009

Custom Header Navigation & NavBar Removal in Blogger

First I'll start off with the NavBar removal. Go to your Dashboard > Layout > Edit HTML and add the following code underneath your template author info:
#navbar-iframe {
display: none !important;

}


Now, for the custom header navigation you will need to scroll pretty far down to:
div id="content wrapper">
Change maxwidgets='4' and showaddelement='yes'


Scroll down to the /* ---( header and site name ) --- */ section and paste the following:
#newnavbar {
font-size:100%;
list-style-type: none;
display:inline;
padding:0px;
margin:0px;
border:0px solid;
}

#newnavbar a {
text-decoration: none;
color: $pagetitlecolor;
}

#newnavbar a:hover {
color: #eee;
}


Save Template

Now go to Page Elements > Add a Gadget > HTML/Javascript and modify the following html:


Last, rearrange your new HTML/Javascript widget under your header:


Note: My Header banner has been modified to be slightly taller. I had to add two navbar widgets to push my navigation links down further so that is wasn't at the top of the banner.

Custom Subdomain for Your Blog with GoDaddy Using CNAME

If you have your own site at GoDaddy and you want to have http://blog.yoursite.com to be your Blogger address, here are the steps:
  1. Log in to your account at www.godaddy.com.
  2. Go to the Domain Manager.
  3. Click the domain that you'd like to use with your blog.
  4. Click the Total DNS Control link at the bottom of the section entitled Total DNS.
  5. Click Add New CNAME Record in the box labelled CNAMES (aliases).
  6. For the Name, type blog or whatever you want your subdomain to be.
  7. Enter ghs.google.com as the Host Name. Specify a TTL or use the default setting of 1 hour.
  8. Click OK, and then click OK again.
  9. WAIT an hour to 3 hours...
  10. Open a command prompt window (Windows Key + R, type CMD, press OK)
  11. type ping blog.yoursite.com (of course you'll need to change yoursite.com to your actual website...)
  12. press Enter
  13. Repeat every hour or so until you get a reply (took me about 3 hours for DNS records to update)
  14. When you get a reply, log into your Blogger account - http://www.blogger.com
  15. Go to Settings > Publishing > switch to Custom Domain > click Advanced Settings
  16. Fill in the Your Domain field with blog.yoursite.com (of course you'll need to change yoursite.com to your actual website...)
  17. Complete the Word Verification and hit Save Settings
You're done!

Tuesday, July 7, 2009

Step-by-Step Websites, Blogs, SEO, SEM All Wrapped Up

So, for the past week I've returned to blogging and establishing my own solid website:
http://www.csxstudios.com.

In doing so, I've pieced together my own way of establishing a website with SEO (Search Engine Optimization) and SEM (Search Engine Marketing) in mind. For my reader (hopefully readers... heh), here's how I would get started with a pretty solid site.

1. Get a Google account (http://www.gmail.com)
2. Purchase your domain and hosting. I used GoDaddy (http://www.godaddy.com).
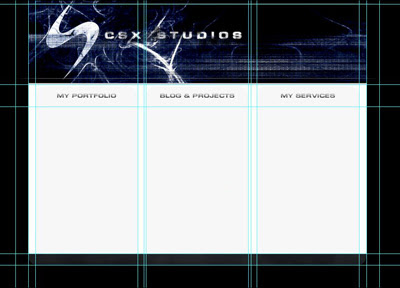
3. Keep your website goals simple. For example, my site has ONLY THREE functions:
  • Display my portfolio
  • Display headlines from my blog
  • Display my services
4. Design your site and put it together.
5. Optimize with Google's Webmaster Tools and Analytics.

Here's how I put together my site step-by-step:

PART I-
"Display my portfolio"
You could make your own custom flash gallery and spend hours making it your own...
OR
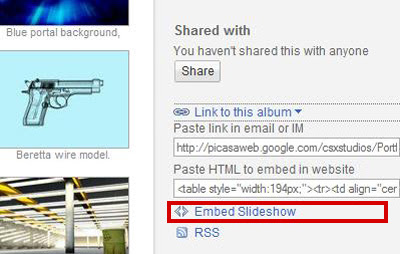
Embed one of your public Google Photos/Picasa Web Albums into your site as a Slideshow using good ol' copy and paste! See below:


PART II-
"Display headlines from my blog"
Google offers templated blog sites for you through Blogger (http://www.blogger.com).
So, sign up, pick a template and start blogging.


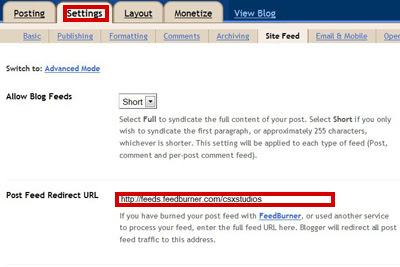
After a few blogs, it's time to get more flexible with Feedburner (http://www.feedburner.com). Input your new feedburner address in your Blogger > Settings > Site Feed:


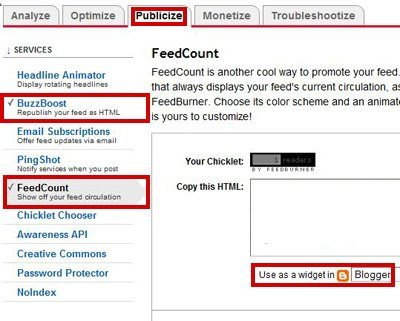
In Feedburner start publicizing with these:
  • Feed Count - little widget on your blog sidebar to show off your readers.
  • BuzzBoost - copy and paste to embed into your ACTUAL website.
  • You have to hit Activate on each one (at the bottom).


PART III-
"Display my services"
After listing "My Services" in HTML on my actual site, I used a simple built-in GoDaddy form(webformmailer.asp). Only two steps:
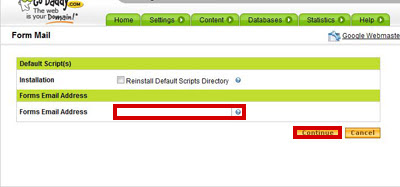
1. Go to Hosting > Manage Account > Content > Form Mail to specify your e-mail address.

2. Use the webformmailer form mail code from GoDaddy into your html page:
http://help.godaddy.com/article/512#webformmailer
Change interval from "hourly" to "
default" and format from "html" to "text".

PART IV-
"Design your site and put it together"
I designed my site in Photoshop and used tables to put my slices together in Dreamweaver. There are free solutions such as GIMP for design and Microsoft's Visual Web Developer Express as a WYSIWYG (What You See Is What You Get) HTML editor.


PART V-
"Optimize..."
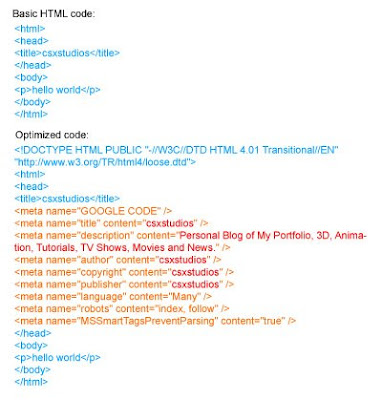
I'll first start off with metatags:


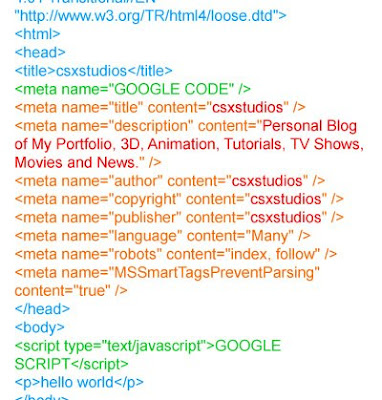
Next, you will need to sign up for:
After signing up for each they both give you snippets of code to put into your html to verify you are the owner of the website. Placement looks like this:


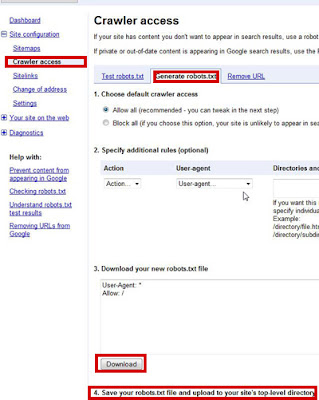
Last, but not least, add robots.txt to your main website directory. Basically FTP to your site and stick in robots.txt there. Robots.txt helps the google crawler index your site. You generate your Robots.txt in Google Webmaster under Site Configuration > Crawler Access > Generate robots.txt:


Last Few Notes:
  • Backlinks - the more people that link back to your site, the better.
  • Age - the longer your site has been established the better.
  • Sitemaps - submit your sitemap to Google Webmaster

Wednesday, July 1, 2009

HDR Image with Mental Ray Physical Sky

Here's how to add an HDR image to your environment map using mr Physical Sky:


Choose Bitmap:


Pick HDR image:


I've just been covering the white areas dragging the whitepoint scroller (-0.4):

Mental Ray Materials (mr materials, mi)

For newcomers to mental ray materials, here's an example of how to use their Architecture & Design templates:


Templates!:

Mental Ray Part 3 (Indirect Illumination)

These are the settings I played around with:


Enable caustics if you have glass/reflective materials, my samples may be excessive (try 1000):


My samples may be excessive (try 1000)::

Mental Ray Part 2 (Renderer)

These are the "medium" settings I used for decent renders. Underneath your render window you should see sliders for Image Precision and Final Gather Precision that are very convenient:


You can choose "Distortion (lume)" to do a fish-eye effect:


Mental Ray Part 1 (Common)

This is just a standard render setting. For HD use 1920x1280:


I changed my material editor to mental ray as well, hit the lock to change:

Exposure Control in 3D Studio Max

I used an HDR image as a custom map (see HDR bitmap tutorial). Daylight system should already set Exposure Control to mr Photographic Exposure Control:


Play around with these settings for your desired look:

35mm Camera in 3D Studio Max

I also set my Target Distance to 100 & f-Stop to 2.0* when enabling Depth of Field (under Multi-Pass Effect):


*the lower the f-Stop, the narrower the focus

Daylight in 3D Studio Max

Here are my daylight system settings (Systems > Standard > Daylight):


How to do soft shadows!:


How to haze the horizon (also hazes away shadows if too high):


Search This Blog