http://www.csxstudios.com.
In doing so, I've pieced together my own way of establishing a website with SEO (Search Engine Optimization) and SEM (Search Engine Marketing) in mind. For my reader (hopefully readers... heh), here's how I would get started with a pretty solid site.
1. Get a Google account (http://www.gmail.com)
2. Purchase your domain and hosting. I used GoDaddy (http://www.godaddy.com).
3. Keep your website goals simple. For example, my site has ONLY THREE functions:
- Display my portfolio
- Display headlines from my blog
- Display my services
5. Optimize with Google's Webmaster Tools and Analytics.
Here's how I put together my site step-by-step:
PART I-
"Display my portfolio"
You could make your own custom flash gallery and spend hours making it your own...
OR
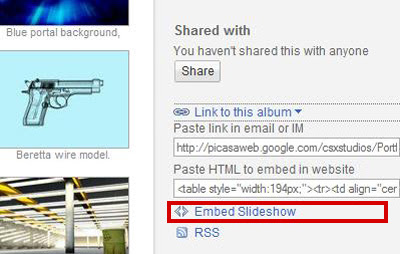
Embed one of your public Google Photos/Picasa Web Albums into your site as a Slideshow using good ol' copy and paste! See below:
PART II-
"Display headlines from my blog"
Google offers templated blog sites for you through Blogger (http://www.blogger.com).
So, sign up, pick a template and start blogging.
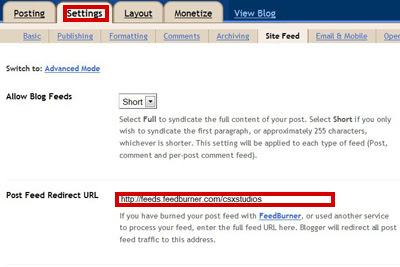
After a few blogs, it's time to get more flexible with Feedburner (http://www.feedburner.com). Input your new feedburner address in your Blogger > Settings > Site Feed:
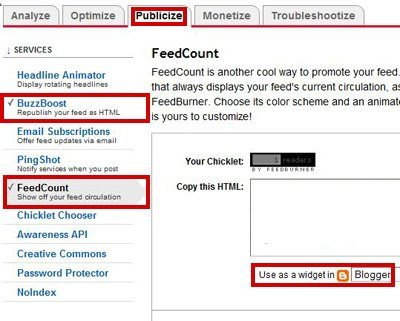
In Feedburner start publicizing with these:
- Feed Count - little widget on your blog sidebar to show off your readers.
- BuzzBoost - copy and paste to embed into your ACTUAL website.
- You have to hit Activate on each one (at the bottom).

PART III-
"Display my services"
After listing "My Services" in HTML on my actual site, I used a simple built-in GoDaddy form(webformmailer.asp). Only two steps:
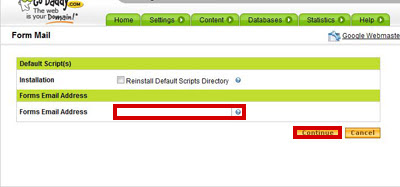
1. Go to Hosting > Manage Account > Content > Form Mail to specify your e-mail address.
2. Use the webformmailer form mail code from GoDaddy into your html page:
http://help.godaddy.com/article/512#webformmailer
Change interval from "hourly" to "default" and format from "html" to "text".
PART IV-
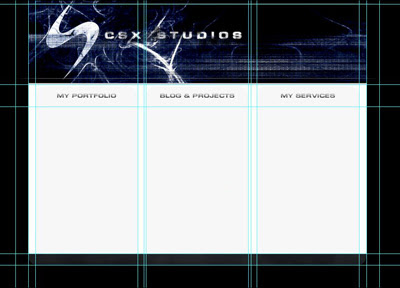
"Design your site and put it together"
I designed my site in Photoshop and used tables to put my slices together in Dreamweaver. There are free solutions such as GIMP for design and Microsoft's Visual Web Developer Express as a WYSIWYG (What You See Is What You Get) HTML editor.
PART V-
"Optimize..."
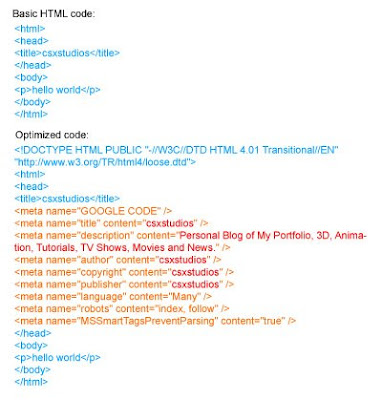
I'll first start off with metatags:
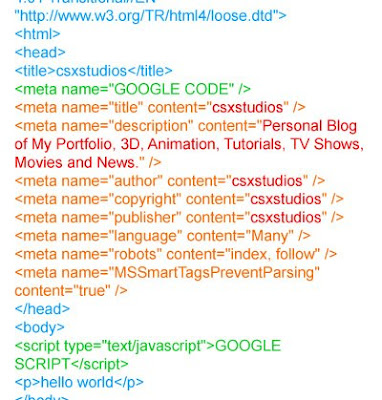
Next, you will need to sign up for:
- Google Webmaster Tools (http://www.google.com/webmaster)
- Google Analytics (http://www.google.com/analytics)
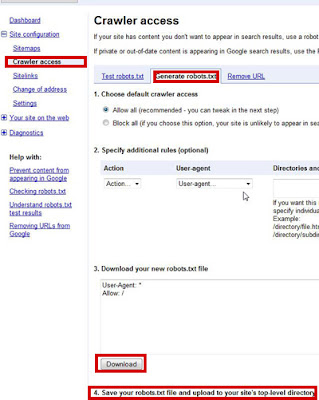
Last, but not least, add robots.txt to your main website directory. Basically FTP to your site and stick in robots.txt there. Robots.txt helps the google crawler index your site. You generate your Robots.txt in Google Webmaster under Site Configuration > Crawler Access > Generate robots.txt:
Last Few Notes:
- Backlinks - the more people that link back to your site, the better.
- Age - the longer your site has been established the better.
- Sitemaps - submit your sitemap to Google Webmaster

No comments:
Post a Comment